Archives

Strawberries: 10 Ways to Eat Them

10 Ways to Eat Strawberries

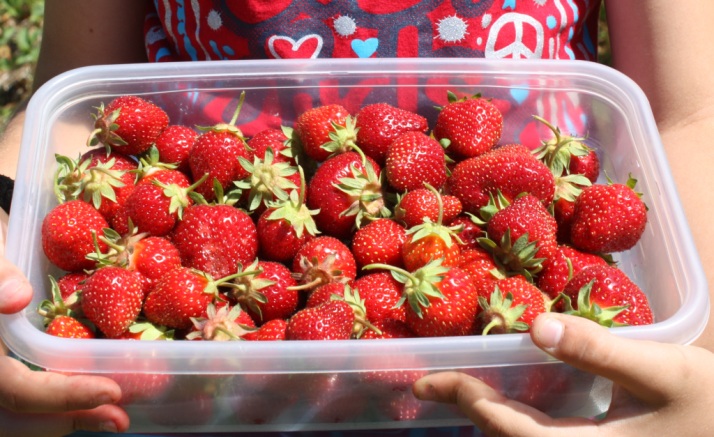
Nothing says summer like fresh strawberries!  In my previous post 9 Reasons To Pick Your Own Strawberries, I mentioned that I had been on 6 fun-filled strawberry-picking excursions with my daughters last month (and I’ve even been again since that post!)  One would think we would have more strawberries than we know what to do with, but the truth is I’ve been having trouble keeping the strawberries long enough to make anything out of them.  My girls devour them (sometimes even before we get home!)  It wasn’t easy, but I did manage to save some strawberries to make a few things. Here are 10 delicious ways to use those fresh-picked, juice-dripping strawberries!

1.  Eat them just as they are!

Of course, this is the healthiest (and our favorite) way to eat them, and they don’t last long.

June 22, 2014 045 crop

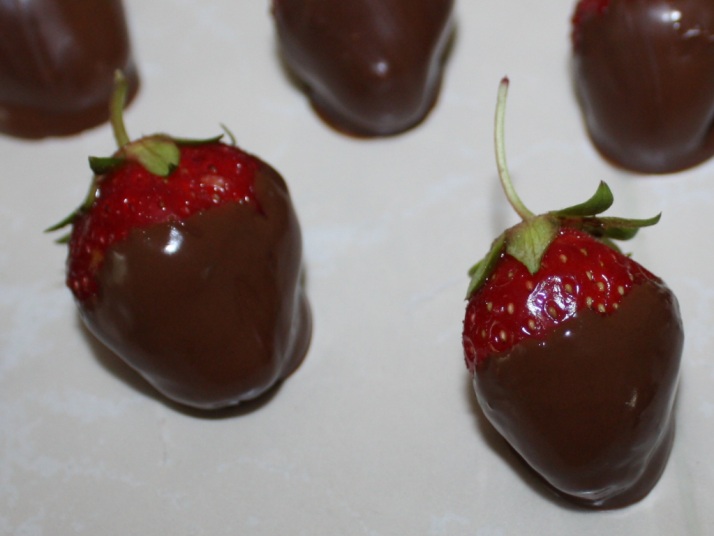
2.  Chocolate-Dipped Strawberries!

June 26, 2014 074 crop

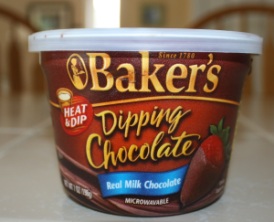
Who doesn’t love the combination of chocolate and strawberries, right?  And truly, they couldn’t be easier to make! It requires 2 ingredients – Fresh picked strawberries & Baker’s Dipping Chocolate (you can find this in the baking aisle of your local grocery store – next to the chocolate chips.)
June 26, 2014 079 crop

Simply melt the chocolate as instructed, dip your strawberries, place on a tray on waxed paper, and enjoy!  If you prefer the chocolate a little bit harder (as we do), place in the refrigerator for about 10-15 minutes.

3.  Strawberry Jam

June 29, 2014 014

June 29, 2014 021

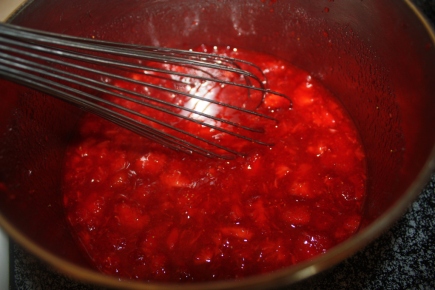
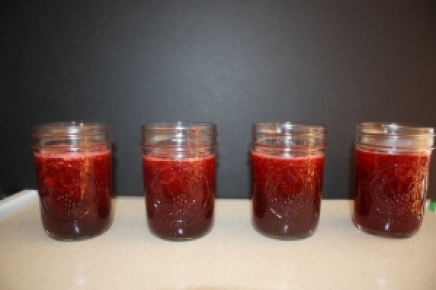
This was our first attempt at making strawberry jam.  Although this particular recipe didn’t go over well with my family, I’m including it in here anyway since we spent the time making it.  Based on the reviews, it is very popular and it does seem like most people enjoyed it.  We halved the recipe since I didn’t know if we would like it and I wasn’t sure how much it would make.  It ended up filling 4 mason jars (8oz each).  Since I normally try to minimize the amount of sugar I put into recipes (and this time I didn’t), for us it seemed way too sweet.  I think next time I would use much less sugar.  You can find the recipe we used here: http://allrecipes.com/recipe/strawberry-jam/

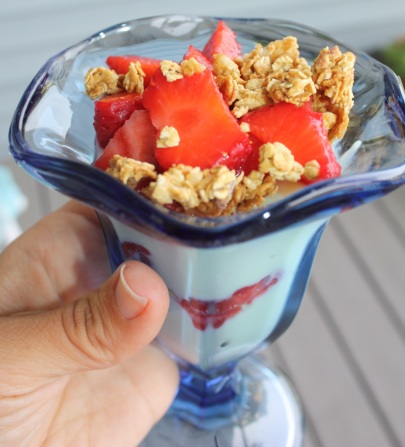
4.  Strawberry Parfait

July 2, 2014 207 crop parfait

This is one of our favorite choices for breakfast.  Simply use your favorite yogurt, fresh strawberries (chopped) any other desired fruits, and granola.  Layer and enjoy!! 🙂

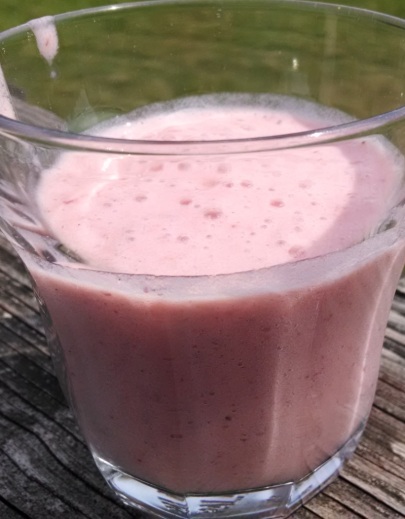
5.  Strawberry Banana Smoothie

July 2, 2014 phone 021 crop

Nothing beats a refreshing, fruit-filled smoothie on a hot day!  You can use any fruit you have on-hand, but here is one of my favorite combinations:

  • 1 cup milk
  • 1 cup fresh strawberries
  • 1 cup fresh pineapple, chopped into bite-sized pieces
  • 1 frozen banana

Blend all ingredients together until smooth.  Enjoy!! 🙂  Note:  Make sure at least one of your ingredients is frozen to make your smoothie cold.  In the absence of frozen fruit, you may want to add some ice to make it cold.  If this doesn’t appeal to you, try my other Strawberry Banana smoothie recipe, my Strawberry Banana Peanut Butter smoothie, or create your own yummy combination!

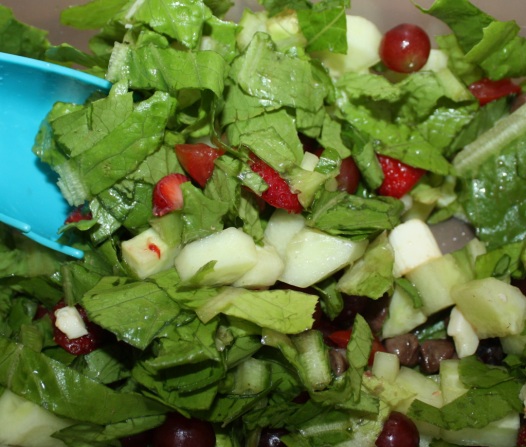
6.  In a salad

I love strawberries in my salad!  I also like to add blueberries, grapes, pineapple, cashews, and chocolate chips in addition to the lettuce, tomatoes, and cucumbers! 🙂  The fruit adds a wonderful juiciness that practically eliminates the need for salad dressing.  YUM!!

June 26, 2014 041 crop

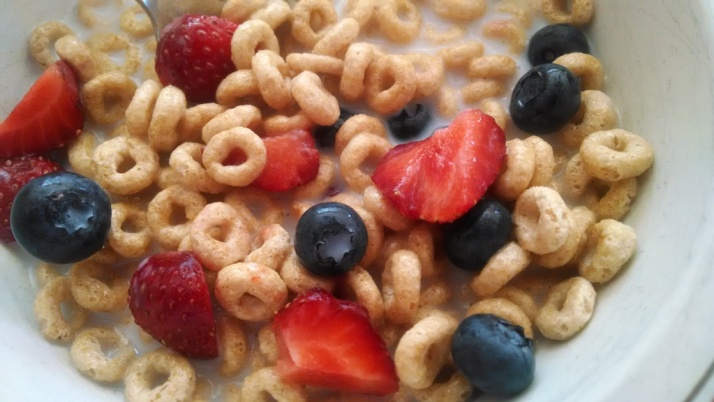
7.  In  your cereal

We love adding fresh berries to our cereal.  Yum!!

July 5, 2014 phone 005

8.  Freeze them.

July 3, 2014 040 crop

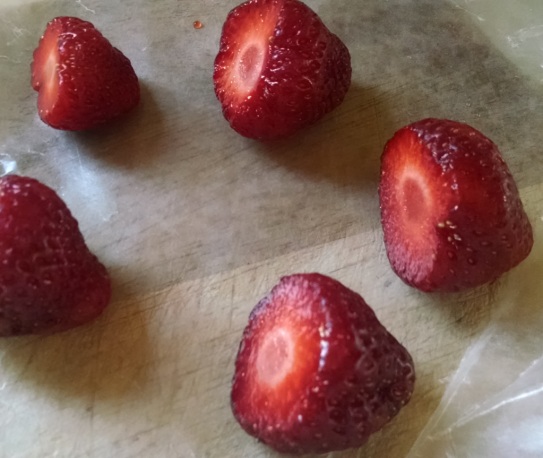
If you have more strawberries than you know what to do with, you can freeze them for later use.  To freeze, begin by removing the stems.  Lightly rinse them and allow to dry.  Then, place them on a piece of wax paper on a cookie sheet in the freezer.  Once frozen, transfer to a ziploc freezer bag.

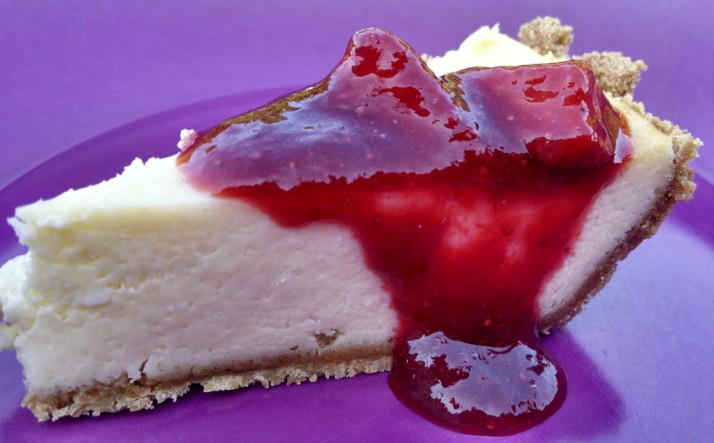
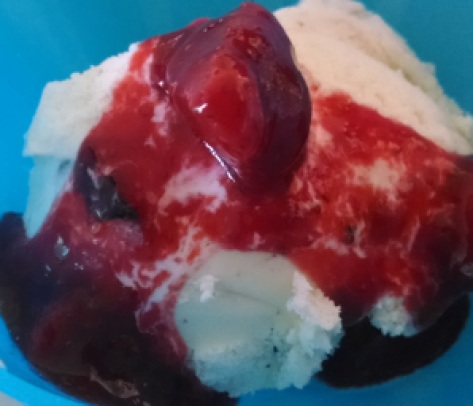
9.  Topping for cheesecake, ice cream, or pancakes

July 3, 2014 060 July 3, 2014 055 crop

My kids absolutely love this stuff!! Here is the recipe we used (next time I’m going to double it!):

Ingredients:

  • 2 cups fresh-picked ripe strawberries
  • 1/3 cup white sugar
  • 1 teaspoon vanilla

Directions:

  1. Wash strawberries and remove stems.
  2. Chop strawberries
  3. Combine sugar, vanilla, and 1 1/2 cups strawberries in a saucepan. (Set aside remaining 1/2 cup strawberries.) 
  4. Cook over medium-high heat, stirring occasionally.  Cook until sauce thickens, about 15 minutes.
  5. Remove from heat.  In a blender, puree mixture.  Add in the 1/2 cup strawberries you had previously set aside.
  6. Store in refrigerator.

The original recipe can be found here: http://allrecipes.com/Recipe/Supreme-Strawberry-Topping/Detail.aspx

I was also hoping to make strawberry pie and strawberry shortcake with fresh-picked strawberries this year, but unfortunately strawberry season is now over in my area so I’ll have to try those out next year.

10.  Strawberry Pie

Update 7/9/15:  I made Strawberry Pie with my daughters this season, and it was delicious!  The link to the recipe I used may be found on my blog Stacy Loves here.

strawberry-pie2

11. Strawberry Ice Cream

Update 6/16/16

This strawberry ice cream, made with freshly picked strawberries, is the perfect treat on a hot, summer day!  The recipe can be found on Stacy Loves here.

Strawberry ice cream recipe

What is your favorite way to eat strawberries?  Do you have a favorite use for strawberries that is not included here?  Please leave a comment below.
Are You Putting Your Health at Risk? 8 Reasons Not to Use Chemicals on Your Lawn

8 reasons to keep chemicals off your lawn2

Spring is finally here!  The trees are budding, the flowers are blooming, and the grass is starting to grow again.  On a stroll through our neighborhood on any Saturday during this time of year, you are likely to see people out walking behind their green spreaders filled with fertilizer and chemicals in an effort achieve that perfectly green lawn that will be the envy of the neighborhood.  Or, the edge of their lawn will be lined with little yellow flags alerting you not to walk on the grass because the lawn company already spread the pesticides.

April 19, 2015 062 pesticide

On a stroll past our house, you will see a sea of yellow dandelions mixed in among the green grass.  And I wouldn’t have it any other way.

I feel like we are the only ones around who don’t use chemicals on our lawn.  Here are some of our reasons why:

1.  Save Time.  My time is very precious to me, and I try to make sure it is spent wisely.  I would much rather spend my time with my family making memories than taking hours out of my day four times a year to go to a lawn and garden supply store, purchase several bags of fertilizer, lug them all home, and then put our health at risk by spreading the chemicals on my lawn.  I feel that my time is better spent with my kids.  In the end, the only thing that REALLY matters in life is our relationships.  In the grand scheme of things, the color of our lawn means absolutely nothing.

2. Save Money.  It would take several bags of fertilizer to cover our .92-acre lawn, with each bag costing around $50.  Since I haven’t bought fertilizer in a few years, I just looked on-line to figure out what it would cost to cover our lawn, and the amount blew my mind!  In the end, we are saving hundreds of dollars each season by skipping this process.  To me, that money is better spent making memories with my family on our summer vacation.

3. We have loved ones who walk on and play in the grass. 

May 7, 2014 095 crop May 7, 2014 065

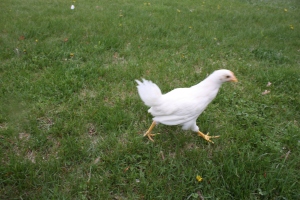
We all love our children, pets, and friends and don’t want to harm them in any way.  I love that I don’t have to worry about my kids, their friends, our dog, or our chickens being harmed by chemicals when they walk on or play in our grass.  It just doesn’t seem right to me to have a lawn that you’re not allowed to walk in.  It’s there for us to play in and enjoy, not just to look at.

When my oldest daughter was 18 months old, we went for a walk one sunny May afternoon.  Our neighbor had recently spread fertilizer on her lawn.  As we walked past her house, my daughter spotted little orange candy-like rocks on the sidewalk.  Thinking it was candy, she picked one up and immediately put it in her mouth and ate it before I could stop her.  I panicked and called Poison Control.  They instructed me to give her a glass of water, and thankfully it turned out to have no effect on her since it was such a small amount.  Nevertheless, it was a scary situation and I’m sure others have had similar experiences.

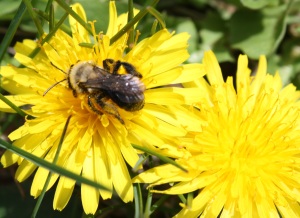
4. It kills the bees. 

May 7, 2014 046 crop

“If the bee disappeared off the surface of the globe,

then man would have only four years of life left. No

more bees, no more pollination, no more plants, no

more animals, no more man.” ~ Unknown

It is said that without bees, the human population would only be able to survive about 4 years.  We rely on the bees for so much of our food supply, including many of our fruits, vegetables, and nuts.

My husband has been a beekeeper for over 3 years and his bees have never survived the winter.  When asking more experienced beekeepers for advice, they explained that they have recently started experiencing the same problems.  Years ago, they would be able to keep their bees through the winter with no issues, but it is getting more difficult each year. Many beekeepers are attributing it to the increased use of pesticides and fertilizers. Here is a great article that discusses bee colony collapse disorder and the role pesticides play in that. http://articles.mercola.com/sites/articles/archive/2012/01/28/bees-death-destroy-food-supply.aspx

5. It contaminates our ponds, lakes, and water supply.

monponsettpondcropbeach_closed

We are blessed to have two large ponds in our town that are home to some beautiful birds and wildlife. For years, the ponds provided clean water and safe year-round recreational use for residents to enjoy. Unfortunately, we have not been able to enjoy these ponds in recent years because they are contaminated.  For several years in a row, the algae reached dangerous levels and warnings were issued to avoid any contact with that water.  Sadly, fertilizers and chemicals are said to have played a major role in the contamination of our beautiful ponds.  It is very unfortunate to drive by these beautiful ponds and beaches on a summer afternoon and see them empty. If they weren’t contaminated with fertilizers and chemicals, we would still be able to enjoy them.

6. Dandelions are useful, nutritious, and I think they are pretty. 

dandelions

I personally love the contrast of the yellow dandelions in the green grass.  I love to take pictures of my kids playing in the dandelions.  They love to pick them.  While everyone else is fighting dandelions, I embrace them and see the beauty in them.  Dandelions are a gift of nature, and they also have many health benefits.  Although I haven’t eaten dandelion yet, I think nature is trying to tell us something by making them so abundant.  I think we need to embrace them and stop fighting them.  For more information on all the wonderful benefits of eating dandelion, check out this blog post by one of my favorite blogs, DIY Natural.

7. It pollutes the air.  Yesterday my friend and I took off on our daily morning walk through a nearby neighborhood.  It was a beautiful morning!  The sun was shining, and there was a slight breeze every once in a while.  Each time the wind blew we would smell chemicals that had been freshly sprayed on the lawns over the weekend.  We were commenting how it can’t be good for us to inhale these chemicals, and it can’t be good for our kids either. Nearly every house we passed in that affluent neighborhood had little flags on their lawn notifying us that chemicals were present. We encourage our kids to play outside, thinking the “fresh air” is good for them. How fresh is it, really, when they are ingesting the chemicals from the neighbor’s lawn?

8.It’s not necessary. 

I think nature is beautiful and perfect just as it is, and I don’t think we need to interfere with it.  I don’t know who decided that a perfectly green carpet of a lawn is ideal, but I disagree.   Our lawns weren’t meant to be perfectly green.  They’re meant to have color.  The grass is there for us to enjoy, not just to look at.  I think people have created unnecessary work for themselves.  I think we should embrace nature as it is rather than fight it.  It’s so much easier and enjoyable to float down the river and appreciate the beauty of it than it is to fight the current and travel upstream.

“True mastery can be gained by letting things go their own way.  It cannot be gained by interfering.”

“One who lives in accordance with nature does not go against the way of things.”

Both of these quotes are from one of my all-time favorite books by Wayne Dyer, Change Your Thoughts – Change Your Life

Conclusion

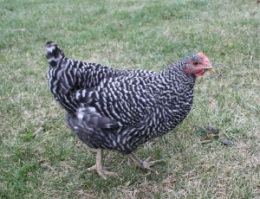
Until we got chickens three years ago, we used to follow the 4-step lawn care routine just like everyone else we know. When we moved into our house, we wanted our lawn to look nice and blend in with the neighbors, and fertilizing the lawn is just what you do in our neighborhood.  I never gave any thought as to why we did it, and I never considered the consequences until we got our chickens. After getting the chickens, I couldn’t bear the thought of them living in the grass and eating these chemicals, which in turn we would eventually be eating when we ate their eggs.

freddy December 25, 2011 073 crop

I am a big advocate of being aware of the things you put in and on your body. In the end, less use of chemicals will result in less contamination of the foods we eat.  Although I respect everyone’s right to do what they want with their lawns, I don’t feel the benefits of a lush, green lawn are worth the time, effort, and ultimate health consequences of spreading fertilizers and pesticides.  What do you think?

Do you use chemicals or fertilizers on your lawn?  Why or why not?  Please leave a comment below.
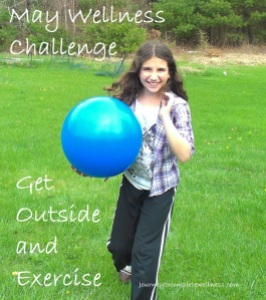
May Wellness Challenge: Get Outside and Exercise Each Day

Happy May!  I feel like this year is flying by!  The warmer weather is finally here in New England, and I’m anxious to get outside and get the kids off their devices and spending more time outside as well.  Unfortunately, they spent a little more screen time than I would have liked this winter.

So far this year, I have been taking on a new wellness challenge each month.  For the month of May, I have decided to challenge myself to get outside a minimum of 15 minutes each day and do some form of exercise, whether it be walking, gardening, mowing the lawn, playing with the kids, etc.  I’m going to challenge my kids to do the same.

2014-05-01 15.21.14 crop4

My goal is to do this 6 days a week, from Sunday through Friday.  I will give myself Saturdays off because I’m a big believer in taking one day a week off from everything (and for me that day is Saturday.)  I think we all need a day each week to recharge.  I will probably end up going outside and exercising anyway, but without the pressure of having to do it and having to document it.  (I always think it’s more fun doing something when I don’t have to do it.)  I do take these challenges seriously and make them a priority in my life for the month, so Monday – Friday I do feel like I have to do it.

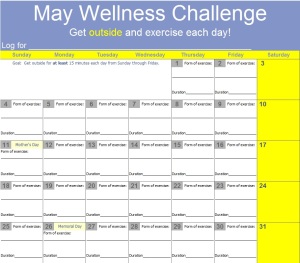
If you are interested in joining this challenge with me, I would welcome the company.  I created this excel spreadsheet to track my progress:  May Wellness Challenge Log Print

Or, you can right click on this image below, click “Save Image As…” to save it to your computer.  You will then be able to print it out to track your progress.

May Wellness Challenge Log

In the event of a day with nasty weather ALL day long, I plan to follow an exercise video of some sort (Yoga, Tae Bo, Tae Chi, etc.) from my video collection or get one from the library, or even play Just Dance with the kids on the Wii.  But hopefully each day will have at least a 15-minute stretch of time without rain so we can get the benefits of sunshine and fresh air!  I know I certainly feel much better after I have been outside.

Today started off rainy, but by the time the kids got off the bus, it was sunny and 70 degrees, so we took the dog for a walk and played basketball together for almost an hour!   The kids are on-board with this challenge and excited to participate.  We plan to reward ourselves at the end of the month if we are all able to successfully achieve our goal.

Happy May!!  May your days be filled with fresh air, sunshine, and all the good things nature has to offer! Enjoy! 🙂


Overcoming Anxiety Through EFT Tapping

“Energy medicine is the future of all medicine.” ~ Dr. Oz

As I mentioned in a post a few weeks ago, my 11-year-old daughter hasn’t been feeling well for about 2 months, and it has been causing her a great deal of anxiety.  While we are still working with the doctors to figure out the cause of her symptoms, we have found a way to calm her anxiety.  I thought I would share how EFT Tapping (Emotional Freedom Techniques) has helped us.

One night about 2 weeks ago, my daughter woke up at 4:30 am in a panic.  She said her throat felt blocked.  She could barely swallow water, and she was terrified!  I was scared, too, but since she could talk and breathe just fine, I knew the biggest problem was her anxiety.  I recalled the nights of her waking up with croup as a baby.  I remembered the cold night air always seemed to help, so I opened the door and had her breathe in the cold air.  It didn’t help.  I told her to sit on the couch and try to relax.  We took some deep breaths together.  Although this swallowing issue was brand new, she had been waking up each night not feeling well for several weeks, and I had no idea what to do.  I silently prayed to God to guide me because I was at a loss. . .and then the idea came to me to try EFT tapping with her.  I began teaching her how to tap.  She was hesitant at first and she thought it was a crazy idea and she felt silly doing it, but eventually she followed along with me and soon enough we were both talking and laughing together.  I taught her a breathing technique I had just learned the day before while listening to one of  Tony Robbins’ CD’s (breathe in 4 times through your nose, then exhale 4 times through your mouth.)  She got a kick out of that! 🙂  We continued to tap and she relaxed enough that she was able to fall back asleep on the couch.  She woke up a few hours later and her throat was much better.  She was able to eat breakfast and then went off to school.

That night, as bedtime approached, she got more and more anxious.  I went to TheTappingSolution.com and downloaded the Tapping for Stress Relief CD (it is free!)  My daughter and I followed along as Jessica Ortner guided us in the 7-minute long Evening Clearing Tapping and then the 8 minute Evening Affirmation tapping.  As soon as the second one was over, my daughter was asleep!  And she didn’t wake up once that night complaining of not feeling well.  She slept through the night for the first time in weeks, and it was great!  Since then, the Evening Clearing Tapping and the Evening Affirmation Tapping have become a nightly habit for my daughter.  She has been sleeping so much better thanks to the tapping (when she does both of them…if she doesn’t do the Evening Affirmation Tapping, she usually wakes up).  It really works!

What is EFT Tapping?

Tapping is a combination of ancient Chinese acupressure and modern psychology.  You use your fingertips to “tap” on specific points on your body while you think about your specific problem and voice positive affirmations.  It helps you get to the root cause of your issues and remove the emotional barriers that are negatively affecting your life.  Tapping has deep healing capabilities, and for those who have doubts about its effectiveness, it is even backed by science and research studies.

I first discovered tapping in February 2013.  Somehow I was led to the World Tapping Summit 2013, and I signed up for it and immersed myself in it for 10 days.  I listened to every presentation and learned how tapping could help in every area of my life.  I was impressed that some of my greatest mentors like Cheryl Richardson and Wayne Dyer were promoting this, so I decided to learn all I could about it.  Like my daughter, I thought it was weird at first and I felt silly doing it in front of the computer, but I became more comfortable over time.  Once the tapping summit was over, I didn’t use it at all because I really didn’t feel like I had a need for it at the time.  To be honest, I felt like I had wasted my time learning it.  When the World Tapping Summit aired this year, I decided not to sign up because I felt like I still had no use for it and I doubted whether it really worked.  Since my time is very precious to me, I didn’t want to “waste” my time on that again.  Little did I know that a few weeks later, it would greatly help my daughter with her anxiety issues and help both of us to regain our sleep at night.  Now I look back on those 10 days I spent in February last year and I can see what a huge gift that was, and I am so grateful I took the time to learn it.  Everything happens for a reason, right? 🙂

Tapping is an amazing tool!  I highly recommend that everyone learn how to do it.  You never know when you will need it or when you can pass on the knowledge to help someone else.  It is so quick and easy to learn, and once you learn it you will have that tool and knowledge for the rest of your life.   I love the fact that anyone can do it, anyone can learn it, and you don’t need any fancy equipment.  The power of your mind is an amazing thing!

Learn to Tap!

TheTappingSolution.com – this website has everything you ever wanted to know about tapping!  It will teach you what tapping is, why it works, how to tap, and so much more!  I highly recommend checking it out for yourself and giving yourself the gift of the knowledge of this amazing tool! 🙂

Peace & Blessings! 🙂

Recipe: Omelet with Sun-dried Tomatoes, Onions, Peppers, and Feta

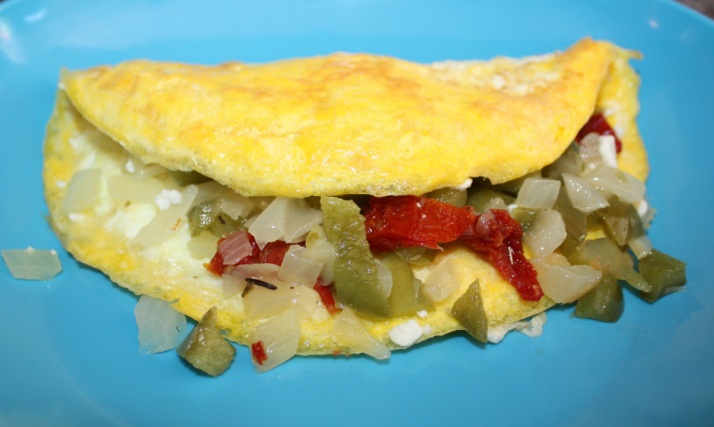
When I was taking the October Unprocessed Challenge this past October 2013, I ate A LOT of omelets and eggs in many different forms.  I also tried sun-dried tomatoes for the first time during that month, and I absolutely LOVED them!  I was surprised at how flavorful they are.  I tried to come up with different recipes to use them in, so one day I put them into my omelet with some leftover Feta cheese I had, and I loved it.  Here is the recipe I came up with.

February 21, 2014 024 crop

Ingredients:
2 eggs, beaten

2 Tablespoons Feta cheese

2 Sun-dried tomatoes (packed in olive oil), chopped

1 Tablespoon + 1 teaspoon coconut oil

¼ cup green pepper, diced

¼ cup onion, diced

Instructions:
  1. In an 8″ non-stick saute pan, melt 1 Tablespoon coconut oil over medium heat.
  2. Saute green pepper and onion in coconut oil until soft.
  3. Remove peppers and onions from pan.  Set aside.
  4. Add the teaspoon of coconut oil to the pan.  Pour the eggs into the omelet pan.  Do not stir.
  5. Once edges harden and you are able to get a rubber spatula underneath the eggs without them breaking, carefully flip the eggs.
  6. Add the cheese, peppers, onions, and sun-dried tomatoes.  Cook until cheese is melted, and fold in half.  Enjoy!

Yield: 1 Omelet

Recipe: Pineapple-Orange-Banana Green Smoothie

October 18, 2014 018 Pine Orange Banana

In an effort to get more greens into my diet, I try to have a green smoothie every day.  When I’m running short on time, this is the one I always fall back on.  It is quick, delicious, and I usually have all ingredients on hand.

I try to keep frozen bananas stocked in my freezer at all times.  I usually buy them in the reduced-produce section at the store when they are very ripe.  I take them home, peel them, break them in half, and then put them into a freezer bag for future use.  It’s a great time saver, and also a great way to keep costs low! 🙂  Here is the recipe:

pineapple orange banana green smoothie

Ingredients:
¾ cup orange juice (I prefer freshly juiced from a juicer, but store-bought also works.)

¾ cup organic baby spinach, packed tightly

¼ cup plain Greek yogurt

½ cup fresh pineapple chunks

1 frozen banana

Instructions:
  1. Blend orange juice and spinach in a blender until smooth.
  2. Add yogurt, pineapple, and banana and blend until completely smooth.

Yield:  24 oz.

Recipe: Pumpkin Pie Smoothie

We have a new favorite smoothie in our house!  I have been on the green smoothie kick lately, but last week I decided to try something different and see if my daughters would give it a try.  My 11-year-old and 6-year-old both loved it!!  They have been finishing this smoothie daily and asking for more!  Like many moms, I am always looking for ways to get as many fruits, vegetables, and superfoods into our diet as possible.  This is an easy way to do it.  This smoothie is packed with superfoods…bananas, pumpkin, oranges and pineapple!  For a great resource and list of 50 superfoods, check out this link.  Give this recipe a try and let me know what you think! 🙂

Pumpkin Pie Smoothie

 Pumpkin Pie Smoothie Recipe

Ingredients:
¾ cup orange juice (I prefer freshly juiced, but store-bought also works)

1 cup organic vanilla yogurt (I like Stonyfield French Vanilla) OR 1 cup Plain Greek Yogurt and 1 Tablespoon Local Honey

½ cup pumpkin puree

½ cup fresh pineapple chunks

½ teaspoon pumpkin pie spice* (see below for substitution)

2 frozen bananas (make sure they are ripe when you freeze them)

Instructions:
  1. Add all ingredients to the blender except the bananas.  Blend until smooth.
  2. Add the bananas.  Blend until smooth.

Yield:  Approximately 34 fl oz

Journeytocompletewellness.com

Update:  1/31/2014 – My kids love this drink and ask me to make it for them every day.  I finally ran out of the pumpkin pie spice, and when I went to buy more I noticed that it was $5.99 for 1.12 oz.  I decided I didn’t want to pay that much for it, so I did some research and found a recipe to make it myself.  Here it is:

Pumpkin Pie Spice

4 teaspoons ground cinnamon

1 teaspoon ground nutmeg

1/2 teaspoon ground ginger

1/2 teaspoon allspice or cloves

Store in an airtight container.

Healthy Replacements: Coconut Oil

I just discovered coconut oil last year, and I can’t say enough good things about it!  I love that stuff and can’t imagine how I ever lived without it!  I use it daily in cooking, baking, and on my skin, teeth, and hair.  I recommend it to everyone!  As I mentioned in my post 10 Things I Learned in 2013, I feel like coconut oil was the best thing I discovered in the past year.   When people ask me for tips on eating healthier, my first suggestion is usually to replace their vegetable oils with coconut oil.  It is a simple change that is hardly noticeable, but the benefits are many.

What is it/How is it Made/How do I select the right product for me?

Coconut oil is the oil extracted from coconuts.  There are two different types of coconut oil:  refined and unrefined.  If you do not like the taste or smell of coconuts, you may want to opt for the refined oil because it is generally tasteless and odorless.  If you do go with the refined oil, just be sure it is not hydrogenated or partially hydrogenated because the hydrogenation process creates synthetic trans-fats.  “Virgin” or “Extra-Virgin” Coconut oil is unrefined and it tastes and smells like coconut.  If you need additional help in choosing whether you want refined or virgin coconut oil, check out this great article here.

Where Can I Buy It?

With coconut oil gaining in popularity, you can find it just about anywhere.  I have seen it at my local grocery store in the organic foods section.  I have also seen it at my local Walmart next to the cooking oils.  You can also buy it in health food stores, and online here.

Uses of Coconut Oil

Coconut oil has many health benefits and is said to help with weight loss, diabetes, cholesterol, Alzheimers, and many other health conditions.  I can attest to it helping with cholesterol.  Last year I threw out my huge jug of canola oil and replaced it with coconut oil.   Since I no longer keep vegetable oils in the house, when baking I now use coconut oil in any recipe that calls for vegetable oil.  When cooking, coconut oil may be used in place of butter or other oils in temperatures up to 350 degrees.  I most commonly use coconut oil when cooking eggs or popcorn.  As a result of this healthy replacement, my “good” cholesterol went up and my “bad” went down as of my last cholesterol screening in October. :)

Coconut oil has many uses for the skin and hair as well.  It is a popular ingredient in many homemade natural products.  I use it daily as a facial moisturizer (as an added bonus, it is naturally an SPF of 4).  I use it as a moisturizing body lotion, as a replacement for chapstick, and I have recently started using it for oil pulling.  For more information on oil pulling, check out this article.  There are so many more uses for coconut oil.  Check out Wellness Mama’s great list of 101 uses here.

More information & Resources

Coconut oil is a solid at room temperature.  It naturally melts and becomes a liquid at 76 degrees Fahrenheit.  When it cools back down, it returns to a solid.

Check out Coconutoil.com for the most up-to-date research on the benefits of coconut oil.

For more in-depth information about all I’ve mentioned in this article and more, including some really great recipes, check out “Lucy Bee’s Definitive Guide to Coconut Oil.” 🙂

With coconut oil becoming a natural beauty staple in recent years, Reviews.com set out to find out which options stood apart by being ethically sourced by socially responsible brands.  They tested the top oils to create a guide to help any natural beauty maven.  Check out their recommendations for the best coconut oil here!

Recipe: Peanut Butter Raspberry Green Smoothie

I have a new favorite smoothie (and it is kid-friendly, too!)

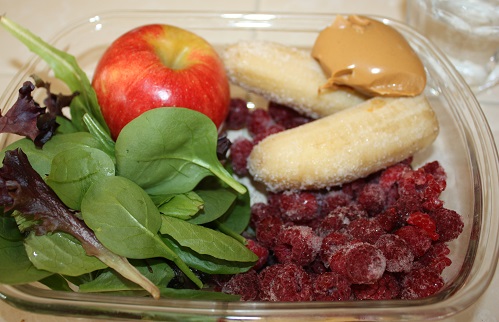
Over the past week, I have tried this recipe with many different additions and variations, but so far this one is my favorite.  My 11-year-old daughter loves it, too!  Here is the recipe:

Raspberry Peanut Butter Green Smoothie


INGREDIENTS:

January 13, 2014 011 crop

½ cup apple juice (preferably freshly juiced in a juicer, but store-bought works, too.  Our favorite apple to juice is Gala, but try different types to see what you like best )

½ cup water

¾ cup tightly packed organic greens (I use baby spinach & spring mix, but any greens you like will work)

2 Tablespoons natural peanut butter

1 frozen banana

1 cup frozen raspberries

DIRECTIONS

  1. Blend apple juice, water, and greens in a blender until greens are dissolved.
  2. Add the rest of the ingredients and blend until completely smooth.

A few notes:

1. It is very important to use frozen raspberries and banana.  If you don’t have frozen, you may want to add a handful of ice.  I have found that you cannot taste the greens at all if the smoothie is very cold.  If you let it get warm, you will begin to taste the greens.

2. You do not need a fancy blender.  Mine is over 12 years old, and is still working just fine.

3.  If you prefer it thicker, use less liquid.  Feel free to play with it and add nuts, seeds, pineapple, different berries, different types of juice or milk in place of the apple juice and water, etc.  I love smoothies because you can play with the recipes and adjust according to your own preferences.

Give it a try, and let me know what you think!  Enjoy  🙂


Peanut Butter Raspberry Green Smoothie

Prep time: 

Total time: 

Ingredients
  • ½ cup apple juice (grape juice or orange juice will also work)
  • ½ cup water
  • ¾ cup tightly packed organic greens (I use baby spinach & spring mix, but any greens you like will work)
  • 2 Tablespoons natural peanut butter
  • 1 frozen banana
  • 1 cup frozen raspberries
Instructions
  1. Blend apple juice, water, and greens in a blender until greens are dissolved.
  2. Add the rest of the ingredients and blend until completely smooth.
Notes
1. It is very important to use frozen raspberries and banana. If you don't have frozen, you may want to add a handful of ice. I have found that you cannot taste the greens at all if the smoothie is very cold. If you let it get warm, you will begin to taste the greens.

2. You do not need a fancy blender. Mine is over 12 years old, and is still working just fine.

3. If you prefer it thicker, use less liquid. Feel free to play with it and add nuts, seeds, pineapple, different berries, different types of juice or milk in place of the apple juice and water, etc. I love smoothies because you can play with the recipes and adjust according to your own preferences.

Healthy Replacements: Homemade Granola Bars

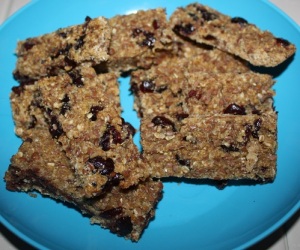
January 3, 2014 001 crop

Granola bars are a staple in my house.  I used to buy a box or two every time I was at the grocery store because my family goes through them so quickly.  When I decided to check out the ingredients list one day, I did not love what I saw.  I saw a huge list of unpronounceable and unrecognizable ingredients, preservatives, corn syrup and oils that I had been trying to stay away from.  You can check out the ingredients in a popular brand here.

I set out to find a healthier recipe to feed my family.  I tried several different recipes until I found one that my family liked.  I started with this recipe called Playgroup Granola Bars from Allrecipes.com,  and then I made some healthy modifications so I could feel better about feeding these to my family.  When making modifications, I try to minimize or eliminate all processed ingredients and GMO’s whenever possible, including white sugar, white flour, and vegetable oils.  There is still  more sugar in here than I would like, but I feel better knowing there is no corn syrup or dangerous oils or preservatives that I have been trying to stay away from.

Here is the recipe I currently use, and my family loves them.  The great thing about granola bars is that you can customize them to your liking.  Add whichever nuts, seeds, and dried fruits you like.  My family loves them with chocolate chips instead of cranberries or raisins.  Again, not the healthiest choice, but I still feel better feeding them these granola bars because I know I have carefully selected each ingredient that goes into them, and they do not contain preservatives or any unpronounceable ingredients.  Give them a try.  I’d love to hear what you think! 🙂

Homemade Granola Bars

January 8, 2014 048 crop

Ingredients:
2 cups rolled oats
1/2 cup packed brown sugar
1/2 cup flax seeds or wheat germ (or 1/4 cup of each)
3/4 teaspoon ground cinnamon
1 cup whole wheat flour
1 cup raisins or dried cranberries (or chocolate chips)
1/4 teaspoon salt
1/2 cup honey (local is best!)
1 egg, beaten
1/2 cup applesauce
2 teaspoons vanilla extract
Directions:
1. Preheat the oven to 350 degrees F. Grease a 9×13 inch baking pan.
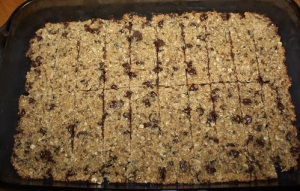
2. In a large bowl, mix together the oats, brown sugar, flax seeds and/or wheat germ, cinnamon, flour, raisins (or cranberries/chocolate chips) and salt. Make a well in the center, and pour in the honey, egg, applesauce and vanilla. Mix well using your hands. Pat the mixture evenly into the prepared pan.
3. Bake for about 23 minutes in the preheated oven, until the bars begin to turn golden at the edges. Cool for 5 minutes, then cut into bars while still warm. Do not allow the bars to cool completely before cutting, or they will be too hard to cut.