Archives

Recipe: Sweet Potato and Carrot Soup

creamy-sweet-potato-and-carrot-soup

Recipe: Sweet Potato and Carrot Soup

Prep time: 

Cook time: 

Total time: 

Serves: 52 ounces

Ingredients
  • 3 Tablespoons butter, divided
  • 1 small onion, about (3/4 cup), chopped
  • ⅛ teaspoon cinnamon
  • ⅛ teaspoon nutmeg
  • 1 large sweet potato, peeled and cubed (about ¾ pound)
  • 1 ¾ cup water
  • 14.5 oz can chicken broth
  • 1 cup carrots, chopped
  • 2 Tablespoons half and half
  • ¼ teaspoon salt
  • ⅛ teaspoon pepper
  • 1 Tablespoon parsley
Instructions
  1. Melt 1 tablespoon butter in a stockpot over medium heat. Add onion to pan; cook until tender, stirring occasionally.
  2. Stir in cinnamon and nutmeg.
  3. Add remaining butter to the pan. Increase heat to medium-high. Cook for 1 minute or until butter begins to brown.
  4. Add sweet potatoes, water, chicken broth, and carrots. Bring to a boil.
  5. Cover, reduce heat, and simmer for 35 minutes or until vegetables are tender.
  6. Place soup mix in a blender. Remove center piece of blender lid; secure blender lid on blender. Place a clean towel over opening in blender lid. Blend until smooth. Pour into a large bowl.
  7. Stir in half-and-half, salt, and pepper.
  8. Pour into bowls. Sprinkle with parsley.


October Unprocessed Challenge 2016: 8 Days of REAL Food

october-unprocessed-2016

We are almost halfway through the October Unprocessed Challenge (eating only REAL food for the entire month of October)!  This is my 4th year taking the challenge, and I am still learning so much every day!

My greatest accomplishment so far this year was finding a recipe for taco seasoning that my whole family loves!!  Taco Tuesday is so much better now, and I feel great knowing exactly what is in the seasoning!  If I get nothing else out of this challenge, I will be happy about my new taco night discovery! 🙂

This year has seemed the easiest so far of all the years I’ve attempted the challenge (last year I only lasted a few days, and then I gave up!).  This blog is what is keeping me accountable this year, and knowing that I’m going to post everything I eat is one of the main reasons I haven’t given up.  Although it seems easier than previous years, this challenge is still a LOT of work and takes a lot of planning and prep, since I often have to make 2 meals for dinner since my kids will not eat some of these new foods (although I do make them try everything.)

Below is a list of EVERYTHING I have eaten for the first 8 days, along with links to many of the recipes.  It’s not 100% unprocessed (chocolate chips are my weakness), but I am happy with my progress so far.  I am surprised that I have not really had any cravings for sweets, and I have not felt hungry at all.

For more real-food recipe ideas each day, check out the Journey To Complete Wellness Facebook page.

If you have any favorite real-food recipes, please feel free to share them in the comments on this post or on the Journey to Complete Wellness Facebook page!  I’ll take all the help I can get! 🙂

October Unprocessed 2016

Saturday, October 1

Breakfast: Omelet with Peppers, Onions, and Sun-Dried Tomatoes

007

Snack:  Grapes ,cashews, raisins
Lunch: Salad (Romaine, tomatoes, cucumbers, raisins) w/balsamic

010

Dinner: Honey Balsamic Sheet Pan Chicken

This is delicious!  I will be making this again (maybe a few more times this month)! 🙂

011


Sunday, October 2

Breakfast: Gluten-Free Banana Pancakes

I love these, and my 12-year old daughter does, too!

013

Snack:  Celery Stick, Raisins, Grapes, Cashews
Lunch: Leftovers from Dinner and  Creamy Tomato Basil Soup

The soup is so tasty!  My 13-year-old daughter loves it as well!

Dinner:  Crock Pot Chicken Taco Chili

This was good, but my family was not crazy about it.  I had a lot of leftovers that I froze in individual portions to use later in the month.


Monday, October 3

Breakfast:  Chocolate Avocado Smoothie

chocolate-banana-smoothie

Snack: Plain Greek Yogurt w/1 T honey & 1T chocolate chips, Popcorn
Lunch: Leftover Chili
Dinner: Mozzarella-Stuffed Slow Cooker Meatballs

This is a favorite in our house!


Tuesday, October 4

Breakfast: Leftover Banana Pancakes/Kiwi/Slice of Boar’s Head Deli Turkey
Snack: Fuji Apple, 5.3oz Greek Yogurt, ½ T Honey & 1T chocolate chips
Lunch: Leftover Chili
Dinner:  Taco Meat w/Jasmine Rice, Lettuce, Tomato. Taco Seasoning

img_8450


Wednesday, October 5

Breakfast: Leftover Banana Pancakes with Grapes
Snack:  Grapes, Chocolate Chips
Lunch: Raspberry Peanut Butter Green Smoothie (I used grape juice)
Dinner:  Slow Cooker Chicken Tortellini Soup (w/brown rice noodles)


Thursday, October 6

Breakfast: Scrambled Egg w/Diced Tomatoes;grapes
Snack:  Peanut Butter Cookies, cashews

pb-cookies-crop

Lunch: Leftover Chicken Soup
Dinner:  Pate Chinois


Friday, October 7

Breakfast: Leftover banana pancake, PB cookie
Snack: Yogurt w/honey & cc; apple; cucumbers,celery,dip,chips,salsa
Lunch: Leftover Tomato Soup
Dinner: Leftover Pate Chinois


Saturday, October 8

Breakfast: Leftover chicken soup
Snack: Kettle corn; Roasted Pumpkin Seeds
Lunch: Strawberry/banana/yogurt/milk smoothie
Dinner: Baked Haddock,rice pilaf, and Roasted Broccoli

img_8531


Recipe: Strawberry Banana PB Smoothie


Straw banana smoothie2

This is my 13-year old daughter’s favorite smoothie.  I make this for her just about every morning.  One thing I love about smoothies is that you can adjust the ingredients to your liking.  Feel free to substitute your favorite flavor of yogurt, and also adjust the amount of milk to your desired thickness.  To make it sweeter, you may also add some raw honey.   Here is the recipe I use:

INGREDIENTS

  • 1/4 cup milk (adjust amount to your liking to achieve desired thickness)
  • 1 ripened banana, frozen
  • 6 whole strawberries, frozen
  • 1 Tablespoon peanut butter
  • 6 oz Strawberry Yogurt (or flavor of your choice)

DIRECTIONS

Add all ingredients to a blender.  Blend until smooth.

Recipe: Avocado Smoothie

avocado smoothie jtcw

I love this smoothie!  To be honest, I did not expect to like this the first time I tried it.  I had an avocado that I wanted to use up, so I searched the web for a recipe, and I found this Avocado recipe from Allrecipes.com.   To my surprise, it was creamy, cool, and delicious!  Since then, I have made a few modifications to suit my taste and preferences, and it has become one of my favorite smoothies.  This smoothie is a nice change from my usual smoothies that contain banana.  My other recipes usually use at least one frozen ingredient, so ice is not necessary, but I think this one is perfect as is with the ice.  Even if you’re not a huge fan of avocado, I think you may be surprised.  Give it a try and let me know what you think! 🙂

INGREDIENTS

  • 1 ripe avocado, halved and pitted
  • 1 cup unsweetened almond milk
  • 6 oz. strawberry yogurt (or flavor of your choice)
  • 2 Tbsp raw honey
  • 8 ice cubes

DIRECTIONS

Add all ingredients to blender.  Blend until smooth.  Enjoy! 🙂


Recipe: Banana Oatmeal Pancakes


Banana Oatmeal Pancakes

Prep time: 

Cook time: 

Total time: 

Serves: 8 pancakes

If you love pancakes and bananas, but you're trying to cut down on white flour and white sugar, I think you are going to love this recipe. These pancakes are healthy and delicious! I love that they are very quick and easy to make and the ingredients are all real food ingredients. I put all of the ingredients in the blender, and the batter is ready to pour within minutes! Enjoy! 🙂
Ingredients
  • 1 cup milk
  • 1 Tablespoon vinegar
  • 2 eggs
  • 1 ripe banana
  • ¼ teaspoon baking soda
  • ½ teaspoon cinnamon
  • ⅛ teaspoon sea salt
  • 2 cups old-fashioned rolled oats
  • 2-3 Tablespoons Coconut oil or butter for coating pan
  • Maple syrup (for topping)
  • Berries (for topping, optional)
Instructions
  1. Combine milk and vinegar in a cup or small bowl. Set aside for a few minutes to sour.
  2. Combine baking soda, cinnamon, salt, and oats in a food processor. Grind until smooth. (A NutriBullet works well for this.)
  3. Add milk mixture, eggs, banana, and dry ingredients in a blender or food processor. Blend until smooth.
  4. Heat coconut oil or butter in nonstick skillet over medium-low heat (or use a griddle pan at 300 degrees). Pour ⅓ cup batter onto the skillet for each pancake. Cook for 2-3 minutes, or until bubbles form around the edges of the pancake. Flip and cook for an additional 90 seconds. Continue with the remaining batter.
  5. Top with maple syrup and/or berries (if desired)

Recipe: Seasoned Sweet Potato Fries

Seasoned sweet potato fries

Do you want to get more sweet potatoes into your diet?

Sweet potatoes are a delicious and nutritious Superfood.  They are high in vitamin B6, they are a good source of Vitamin C and magnesium, and they also contain Vitamin D, Iron, and Potassium. Packed with nutrients, I have been trying to incorporate more sweet potatoes into our diets, but it has not been easy since they are not a favorite food in my family.

I was so excited when I discovered this recipe originally intended for russet potatoes.  My family loved it with regular potatoes, so I decided to try it with sweet potatoes as well, and it was a hit!!  I usually prepare this using a combination of sweet potatoes and russet potatoes.  I hope you enjoy it as much as my family does!  Enjoy!

Ingredients:

  • 3 Russet Potatoes (or 2 Russets and 1 Sweet Potato), quartered
  • 4 Tablespoons (1/4 cup) olive oil
  • ½ cup parmesan cheese
  • ½ teaspoon salt
  • 2 teaspoons Italian Seasoning
  • 1 teaspoon garlic powder
  • 1 teaspoon paprika

Directions:

  1. Quarter potatoes. Place into a large mixing bowl.
  2. Coat potatoes evenly with olive oil and parmesan cheese.
  3. In a separate small bowl, mix together salt, Italian seasoning, Garlic powder, and paprika
  4. Cover potatoes evenly with spice mixture.
  5. Lay potatoes in a single layer on a cookie sheet lined with aluminum foil.
  6. Bake at 400° for 40 minutes.


Strawberries: 9 Reasons to Pick Your Own

strawberries 9 reasons to pyo

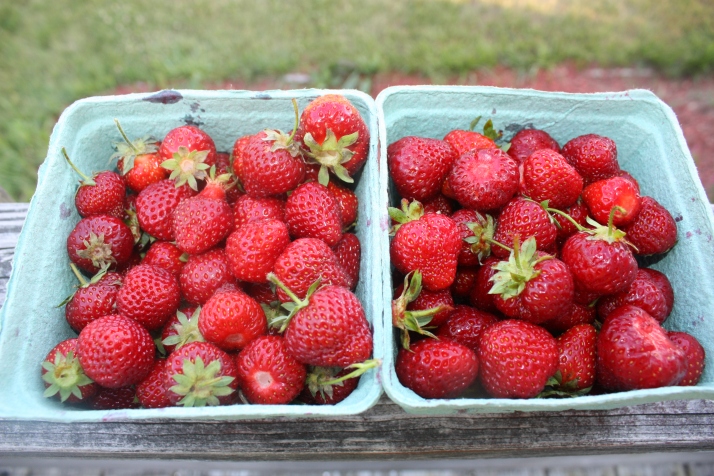
Nothing says summer like fresh strawberries!  Pick-Your-Own Strawberries is just beginning in our area of Massachusetts this week, and we couldn’t be more excited!  Yesterday, my daughters and I just went on our first berry-picking excursion of the season at our favorite local berry farm.  I’m sure it will be the first of many because strawberries don’t stay around for long in our house before my girls devour them!

Here are 9 reasons why we love to pick our own strawberries:

June 22, 2014 051

1.  It’s fun! 

Strawberry picking signals the beginning of summer for me, and it is like a little scavenger hunt finding the perfect strawberries to feed my family.

2.  It costs less.

A quart of strawberries at our local farm stands cost about $6.50, but if you pick your own and bring your own containers, you can get considerably more strawberries for the same price.  You may be able to get them “on sale” at the grocery store for much less, but the quality is nowhere near that of the strawberries you pick for yourself.

3.  They are fresher.

June 29, 2014 007

Can’t get any fresher than picked right off the plant!

4.  They taste better.

Picked at the peak of ripeness, my girls think strawberries taste better than candy! (I LOVE that!) 🙂

5.  Great pictures.

I LOVE taking pictures, and strawberry fields are a wonderful location to get some great shots!

6.  Support local farmers.

Keeping your money in the community and helping other local families is always a good thing!

7.  Healthier – fewer chemicals.

Even if your local farm isn’t “certified” organic, many of them do not spray pesticides directly onto the fruit, especially if they are allowing you to pick your own.  Talk to your farmers to find out their exact procedures, but generally in talking with my local farmers I have found that their practices are much safer than that of commercially grown produce.   Just being able to talk to the farmer is a benefit in itself.  Although strawberries are part of the “dirty dozen” and it is recommended to always buy organic, I would buy local strawberries that are not organic over organic strawberries in the supermarket any day!

8.  It’s better for the environment.

Buying local reduces your carbon footprint.  Make sure to bring your own containers to save money and eliminate the need for packaging.

9.  You get to choose the strawberries you like best! 

There’s nothing worse than paying a premium price for strawberries in the grocery store, only to have to throw away half the container because the strawberries are rotten or not suitable for eating.  Picking your own ensures that you are only paying for the BEST strawberries.

If you’re wondering what to do with all of the delicious strawberries you have picked, be sure to check out my blog post Strawberries: 9 Ways to Eat Them.

10 Tips to Begin Eating Healthier

10 tips to begin eating healthier2

If eating healthier is one of your goals but you don’t know where to begin, I will share some tips that have helped me along in my journey to eating more REAL foods and minimizing the amount of processed foods in my diet.

What IS a REAL Food?

Any food that comes from nature and can be purchased without a label is a REAL food (fruits, vegetables, raw nuts, seeds, etc.)  REAL foods will help to fuel your body with the nutrients it needs.  Ideally, you want to strive to eat foods as close to their natural state as possible.  Foods that have been packaged usually have been processed in some way, so you want to choose REAL foods without packaging whenever possible.  Many REAL foods are also labeled as SUPERFOODS.  I have discovered this excellent resource that lists 50 Superfoods and their benefits.  It also suggests healthy recipes to help you integrate these SUPERFOODS into your everyday diet.  I always find it helpful to focus on the foods I should be eating rather than those I should not be eating, so I highly recommend checking out that list from skinnyms.com and printing it for future reference.  Once you know which foods are ideal to eat, here are some tips to help you incorporate those foods and to minimize the amount of highly processed foods in your diet.

1.  Learn to Read Ingredient Labels.  If you’re striving to eat healthier, this is the first step I would recommend.   If you prefer more variety in your diet than just foods without a label, it is very important to learn to read the ingredient labels on your foods.  The nutritional information label can sometimes be helpful, but I think it is much more important to look at the ingredients.  If there is anything on a label that you cannot pronounce or you don’t know what it is or where it comes from, you most likely do not want this food to be a part of your regular diet.  The same thing goes for foods with a long list of ingredients.  When comparing processed foods, you generally want to choose the product with the fewest number of ingredients.  A few ingredients you particularly want to avoid include corn syrups, artificial colors and flavors, and hydrogenated oils.  Also, be weary of any foods that make health claims on their packaging.  For example, I always choose the full fat versions of foods rather than those with the “Fat Free” label.  “Fat Free” foods are often a poor choice because additional ingredients generally need to be added to the product to make the food taste good once the fat is removed.  Here is an excellent video from 100 Days of Real Food to help you learn to read ingredient labels.

2.  Clean out your kitchen/pantry.  If your goal is to eat healthier, it would be a good idea to remove all the unhealthy foods from your home.  Otherwise, you will be tempted each time you open the pantry.  Take everything off your shelves.  Discard anything that is expired.  Donate anything that you don’t plan to use before the expiration date, and donate all highly processed foods (those with a long list of ingredients or a lot of unpronounceable ingredients.)  Oftentimes, we eat food just because it is there.  If a food is not in your house, it will be that much more difficult for you to eat it.  If you get a strong craving for something, you will have to go out of your way to get it.

3.  Don’t buy processed foods.  It all starts in the supermarket.  Don’t buy the junk foods.  Again, if you don’t bring it into your house, you can’t eat it. You may have heard these food shopping tips before, but they are worth repeating:  don’t shop when you are hungry, go prepared with a shopping list and DO NOT stray from the list, and stay on the outer perimeter of the supermarket.  The inside aisles mostly contain the processed foods.  If at all possible, go shopping without the kids.  Mine certainly have a way of getting me to buy unnecessary (and often unhealthy) items that are not on my list.  Also, keep in mind that when you buy a food item, you are voting with your dollar.  Vote to support REAL, healthy foods!

4.  Find Healthy Replacements.  Find healthier replacements for foods you commonly eat.  For example, use REAL butter instead of margarine, use coconut oil instead of canola oil, make your own popcorn instead of buying bagged microwave popcorn, make your own salad dressing instead of the store-bought dressings loaded with high fructose corn syrups, or even start by making your own cookies instead of buying store-bought cookies loaded with trans-fats.

5.  Become accountable.  Find a buddy who is also interested in eating healthier, or join a support group on social media for people who share a common goal with you.  Share recipes and support each other,   For example, the 100 Days of Real Food Mini Pledge Program group on Facebook will help you cut out processed foods in 14 weeks.  Members share recipes and tips, and they encourage and support each other with their struggles throughout the challenge. I am also a member of the October Unprocessed community, which is also wonderful and supportive.  October Unprocessed is a challenge I participated in for the past two years, and the goal is to go through the entire month of October without eating any processed foods.  The challenge was a very inspiring, eye-opening, and educational experience for me.  In fact, that is what inspired me to begin this blog! 🙂  I would encourage everyone to participate in October Unprocessed 2015, but don’t wait until then to begin eating healthy.  You can start taking small steps today!

6.  Track your progress with a blog or journal, or track your nutrition through an app such as MyFitnessPal.  For more ideas on how to track your progress, check out my previous post 5 Tools to Track your health and Fitness Goals.

7.  Get into the habit of making a smoothie for breakfast every day.  A smoothie (or green smoothie if you’re a little more adventurous) is a nutritious way to start the day and to help you get more fruits and vegetables into your diet, and it will keep you full until lunch.  Not sure how?  Here’s one of my favorite recipes.  Adapt it to your liking with your favorite fruits and vegetables.  There are so many different combinations you can try!  Visit Simple Green Smoothies for more smoothie recipes and tips.

My daily smoothie is something I look forward to, and I am so happy I have implemented it into my daily routine and made it a habit.  Give it a try, and you may even find that it is an easy way to get more fruits and vegetables into your kid’s diets!

8.  Don’t completely deprive yourself of the foods you love.  Start slow.  Try to find healthier replacements to satisfy your cravings.  If you love chocolate, maybe you could opt for a handful of Ghirardelli chocolate chips instead of a full candy bar.  Just be careful.  It is still sugar, and sugar is HIGHLY addictive. Once you start eating it, you will want more.

9.  Become educated.  Learn WHAT you are eating and WHERE it is coming from.  There are some excellent books and food documentaries on this topic.  Click the links for my reviews on the food documentaries Food, Inc, What’s on Your Plate?, Fat, Sick, and Nearly Dead, and Fed Up.  If you’re interested in learning about the source of your food, some excellent books I have found on this topic include The Omnivore’s Dilemma by Michael Pollan and Animal Vegetable Miracle by Barbara Kingsolver.  Animal Vegetable Miracle also contains some wonderful recipes, and it will teach you how to eat seasonally and how to preserve your food so you can eat from your garden or local farm stand year-round.  I have found all of these books and movies to be inspirational, and some of them were even life-changing for me!

10.  Find REAL food recipes.  Visit my Recipe page for my favorite REAL food recipes, or check out the extensive list of REAL food recipes on 100 Days of Real Food.

Please keep in mind that this journey to a lifestyle of eating REAL foods is a process.  Everyone does it at their own pace.  I feel like I’ve learned so much and I’ve come a long way from the way I used to eat, but I have still have SO far to go.  I still eat plenty of junk food (as you might see from some of my favorite recipes on my blog Stacy Loves), but when I do, I try my best to choose the healthiest options and make it myself when I can.  As with everything in life, I believe balance in all areas is the key to optimal health.  Good luck! 🙂

Recipe: Homemade Granola

Homemade Granola

As promised in yesterday’s post, here is my recipe for homemade granola.  This post can also be found in my blog, Stacy Loves…

I made granola for the first time last week.  I had never realized before how easy it is to make.  After trying some that my friend had made, I had to have her recipe.  I modified it to my liking and according to the ingredients I had on hand at the time.  That is one of the great things about granola…you can use whichever nuts, seeds, and extras you personally prefer or have on-hand.

Homemade granola can be made at a fraction of the cost of store-bought granola, and it is really easy to make!  It is packed with nuts, seeds, dried fruit, and nutrition.  According to this article on WebMD, oats are one of the top ‘Superfoods’ that everyone needs.  Granola is an easy way to get lots of nutrients and superfoods into my kids’ diets.  I love to eat this plain, but it is also delicious mixed in yogurt or eaten as a cereal with milk.

The recipe I use is below, but feel free to modify the ingredients to your own liking.  Just try to keep the measured amounts the same.

Ingredients:

  • 3 cups old fashioned oats
  • 1/2 cup pecans (or nuts/seeds of your choice)
  • 1/2 cup cashews (or nuts/seeds of your choice)
  • 1/2 cup almonds (or nuts/seeds of your choice)
  • 1/2 cup brown sugar
  • 1/4 cup honey
  • 1/4 cup pure maple syrup
  • 1/3 cup coconut oil
  • 1 teaspoon vanilla
  • 2/3 cups dried fruit (raisins, cranberries, etc.)
  • (Optional) Extras:  Shredded coconut, chocolate chips, etc.

Instructions:

  1. Spread oats in an even layer on a baking sheet.  Bake at 325° for 7-10 minutes.
  2. Transfer oats to a large mixing bowl.
  3. Chop nuts/seeds in food processor until chopped but still coarse.
  4. Mix nuts/seeds into mixing bowl with oats.  Set aside.
  5. In a saucepan, combine brown sugar, honey, maple syrup, and coconut oil. Bring to a boil.
  6. Once boiling, remove from heat and add 1 teaspoon vanilla.
  7. Pour mixture into nut/seed/oats mixture and mix until combined.
  8. Add dried fruit.
  9. Bake at 325° for approximately 15 minutes.
  10. Add chocolate chips or other extras (if using).
  11. Let cool and transfer to an airtight container.
  12. ENJOY!!! 🙂

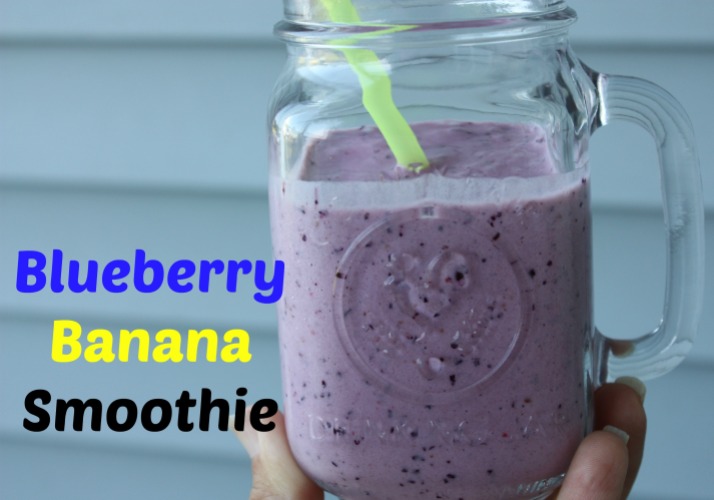
Recipe: Blueberry Banana Smoothie

August 5, 2014 007 crop2

If you have been looking for ways to use up all those delicious blueberries that are in season right now, give this healthy smoothie recipe a try.  This drink is very filling and it would serve as a delicious breakfast, lunch, or a snack!  Enjoy it any time of the day!  We have been making this smoothie a lot lately, and I’m happy to say that ALL of my daughters love this one! 🙂

Ingredients:

1/2 cup milk

1/2 cup yogurt (I like Stonyfield Banilla)

1/2 cup fresh blueberries

1/2 cup frozen strawberries

1 frozen banana

1/2 cup organic spinach or other greens (optional – I usually don’t add this because my daughters will not drink it if they know there are greens in it.)

Instructions:

  1. In a blender, combine all ingredients.  Blend until smooth.

Notes: 

Make sure at least one of your ingredients is frozen to make your smoothie cold.  If you do not have any frozen ingredients, you may want to add some ice.

This smoothie is best served immediately, especially if you are using the greens.

If you are adding greens, blend the greens and the liquid until smooth before adding the remaining ingredients.

Enjoy! 🙂